Snow Globe Card
by Libby Hickson
You’ve seen these cute snow globe shaped cards around the Internet – here’s how to make one for yourself!
Supplies

- One 4” x 6” piece of cardstock (Sahara Sand used here)
- One 2” x 4” piece of patterned paper (Holiday Lounge used here)
- Two 2” x 4” pieces of white cardstock
- Two scrap pieces of white cardstock
- Acetate
- Circle cutter (Spellbinder Nestabilities™ and Cuttlebug™ used here)
- Scissors
- Paper Trimmer
- Adhesive
- Stamps (FireCracker Designs by Pamela’s Gifts of Love used here)
- Embellishments
- Flower Soft™ Polar White (optional)
- StazOn™ Opaque Cotton White ink (optional)
Step-by-Step
-
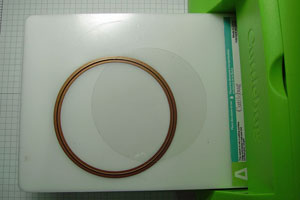
Step 1
Use your circle cutter to create a 3.75” circle out of acetate.
-
Step 2
Make pencil marks at 0.25” from each end of the 2” x 4” piece of patterned paper.
Repeat on the two pieces of 2” x 4” white cardstock.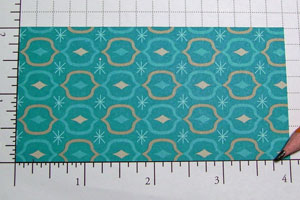
-
Step 3
Using your paper trimmer, create tapered base edges by cutting from your pencil marks to the opposing corners.
Repeat on two pieces of 2” x 4” white cardstock.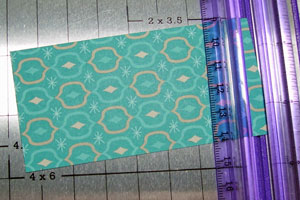
-
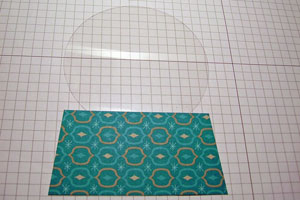
Step 4
Attach acetate circle to the tapered base.
-
Step 5
Attach one tapered white cardstock base to the backside of the patterned paper base, hiding the glued edge of the acetate circle.
Optional:
The second tapered base can be used inside the card, if desired.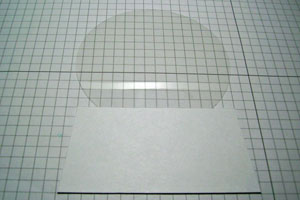
-
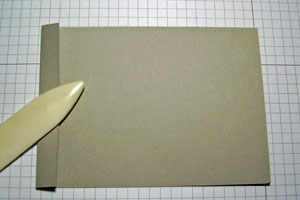
Step 6
Position the 4” x 6” piece of cardstock lengthwise, and fold the paper 0.5” from one end.
-
Step 7
Using your base and globe as a template, trace the same shape onto the folded piece of 4” x 6” cardstock.
Hold the flap down to extend the top of the circle onto that folded end of paper.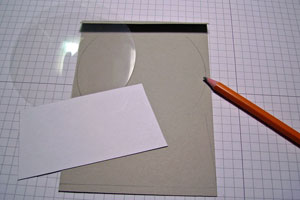
-
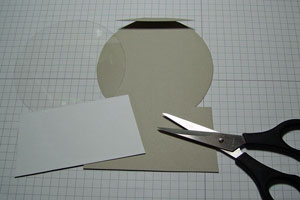
Step 8
Cut out the snow globe shape using your scissors.
-
Step 9
Trace the top of your acetate circle onto one piece of scrap white cardstock, then freehand draw the shape of a snowdrift and cut out.
This will be attached at the top of the snow globe to hide where the acetate will attach to the flap of the 4” x 6” piece.
Optional:
Trace and cut out an identical snowdrift to hide the flap on the inside of the card.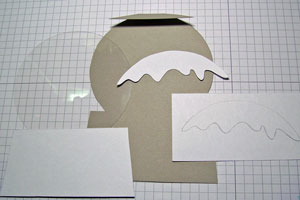
-
Step 10
Attach the 4” x 6” cardstock to the acetate at the flap.

-
Step 11
Attach scrap paper snowdrift to hide the attachment flap.
Optional:
Add Flower Soft™ to create the texture of snow.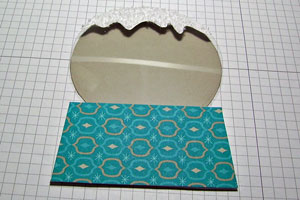
-
Step 12
Decorate and finish your card. Trim any uneven edges with scissors.
Optional:
Add snowflakes to the acetate using white StazOn™.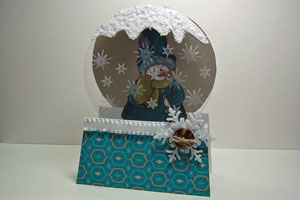
Video!
Your Turn
You've seen the tutorial, now you try it! We've got a section of the gallery set aside for Snow Globe Card. Try this technique, then upload your artwork to the gallery. Show us your creations!
***Please note - Internet Explorer/Edge is not a supported browser, and will not allow you to see the videos. Please use Chrome, Firefox or Safari to view our tutorial videos.

 *
*
Questions and Comments
We'd love to get your feedback or questions. Leave your comment below.
Thanks,
Tammy
Thank you
Thanks for sharing
Page 1 of 3 pages 1 2 3 >